Setting Up Your Social Media Display with Publing
Social Media Hub is the main structure to aggregate posts from the most popular social media platforms and displaying it. Social Media Displays, on the other hand, are the visual components to display directly the content. If you like to know more about the Social Media Hubs you can check this post. There are three fundamental steps in order to setup your display we wanted you to know. Before these three steps, you need a Publing account. If you don’t have, click here to get one for free.
Social Media Hub Structure
Content Source
This is the phase of sourcing the content. Publing collects the content from the social media platform you chose within the criteria you set. For instance in order to collect the posts from a Facebook Page you need one content source and for collecting the posts tagged by a #Hashtag from the Instagram you need another content source. Content sources update the content within a period as in your licence plan.
Here is how you create a content source:
First, you should pick the channel (e.g. Facebook, Twitter, Instagram etc.) you want to collect the content from. Then select the channel type; each channel has its own querying methods.
Afterwards, you just need to type the query; for example if you want to collect the posts from Publing Twitter account you should type @publingco username.
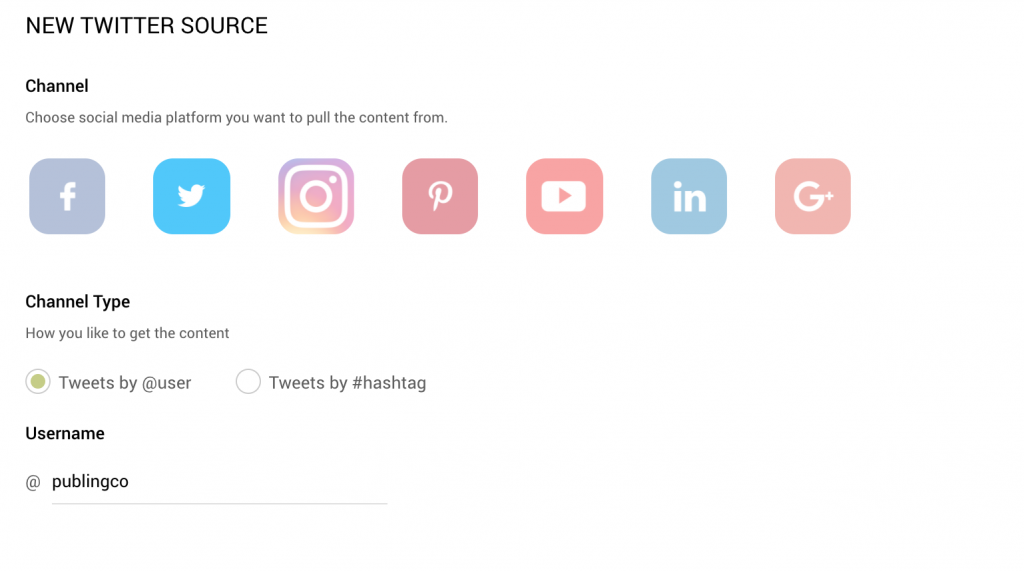
Once you validate the source, we connect to the Twitter and getting extra information of your source to help you more.
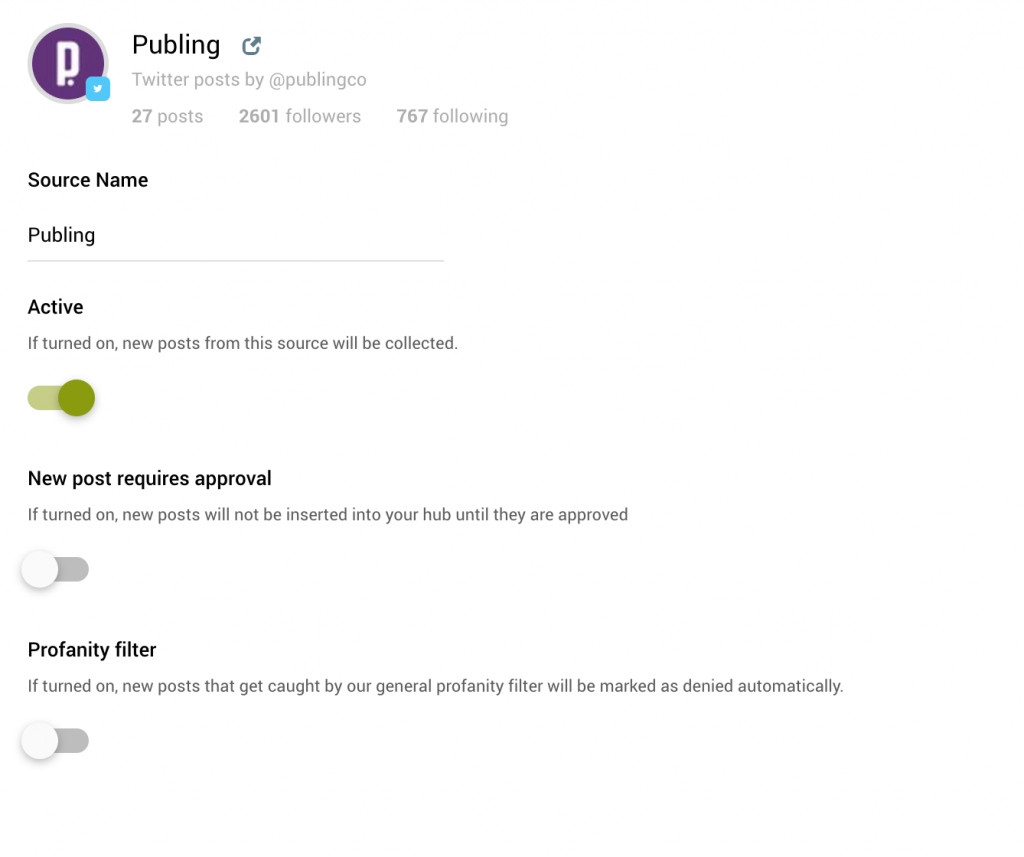
Active/Passive: If the channel should be active or not. Of course, in the beginning, you want to create an active source. However, just in case, if you like the source to get started collecting the data later, you can activate the channel later.
Approval: If you want the content to be displayed without any moderation you can turn it off. It might be useful when you aggregate your own official accounts. If you are aggregating user generated content, the content created by your customers, which may contain some offensive words, our moderation mechanism may help you securing your live wall.
Profanity Filter: Let us help you saving time with the profanity filter which prevents your live wall and your moderation from the profanity words.
Content Moderation
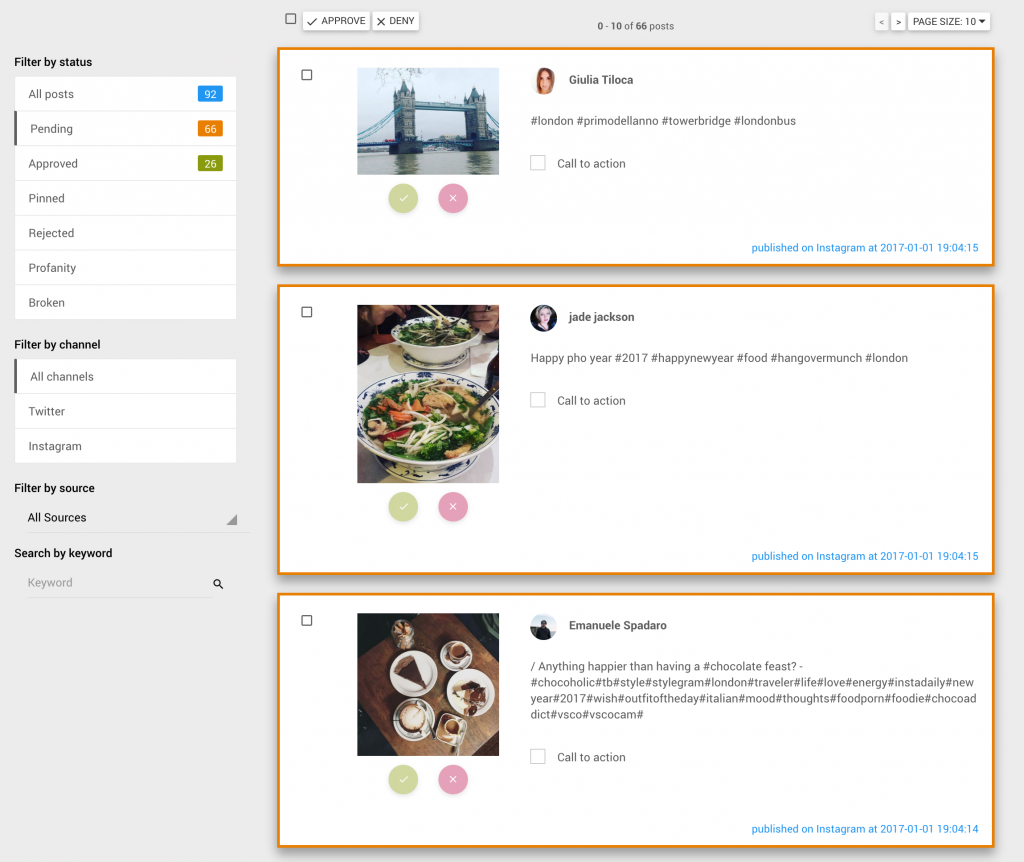
This is the control phase of the content, sourced by the Content Source. If you don’t want to moderate the content, you can by-pass the Content Moderation and display the new content directly.
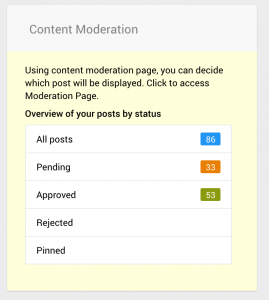
Content moderation made easy with our easy-to-use panel. All you need to decide which content to be displayed.
Content Display
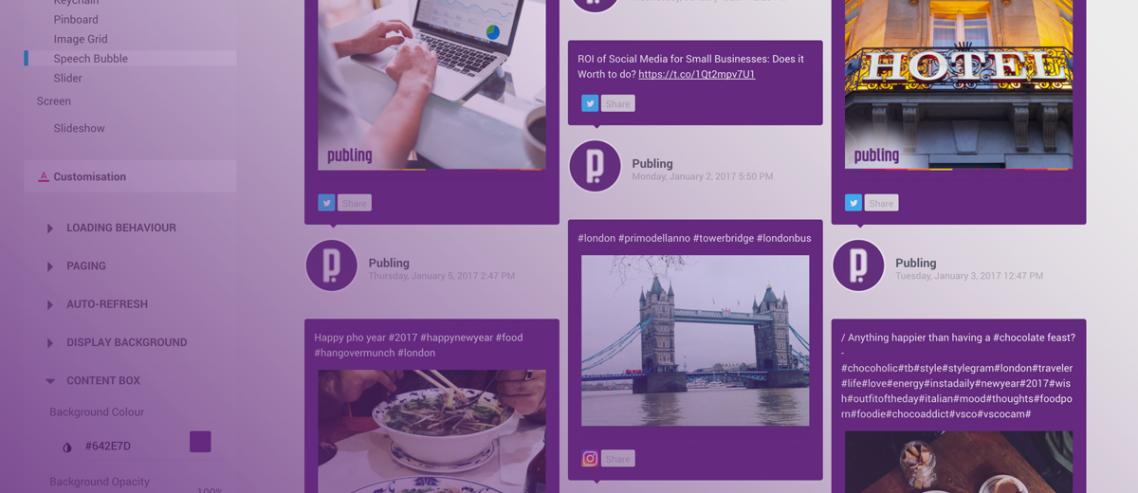
This is the phase of displaying the moderated content. Below we have a screenshot from Publing’s easy-to-manage editor. You see exactly what your customers are going to see. You can customise it to match your brand and that’s it. You are ready to go. For further information, you can check this post.
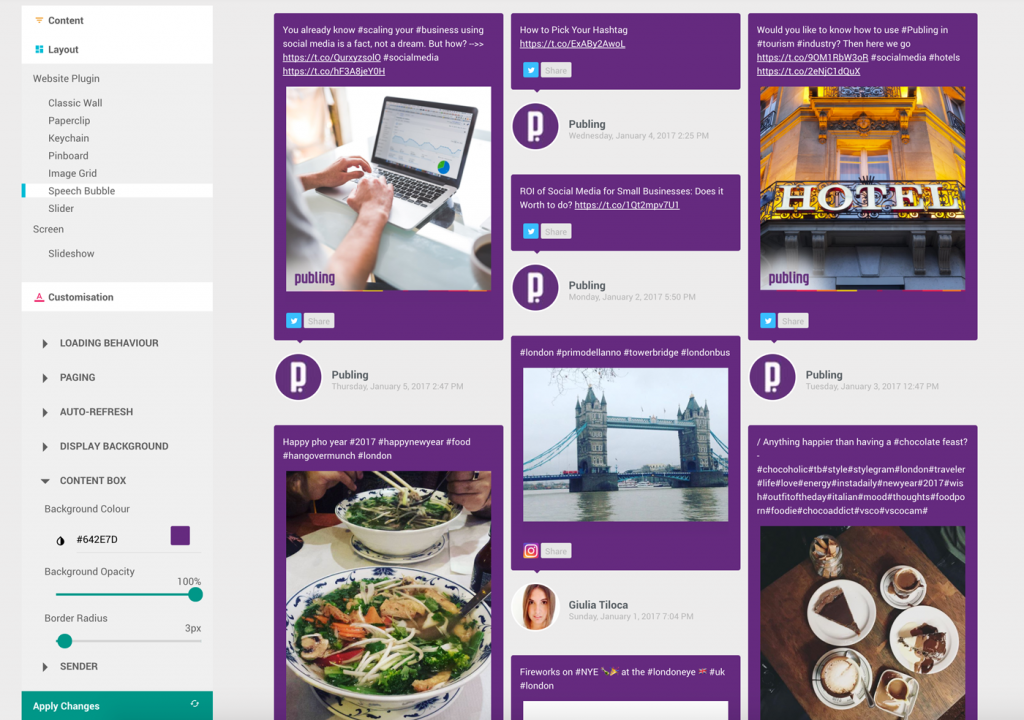
First, decide which content sources are shown on the display. Then choose the layout among the ones we designed for you and customise the design according to your brand and your website and publish it. Easy as that.
Just to recap:
In order to set up a Content Display you need to follow these steps;
- Step 1: Create your Social Media Hub
- Step 2: Setting up the Content Sources’, which will collect sources periodically
- Step 3: Approve/Reject/Pin the content to moderate the content (This is something you need to do periodically in order to keep your display up-to-date)
- Step 4: Create your Content Display
- Selecting contents, which will be displayed
- Choosing the display’s layout
- Customising the display’s layout
- Publishing the display and getting the embedding code
- Step 5: Embed the Content Display by using the given code. The HTML Code can be placed on the business’ website wherever you want to display the hub.
- Step 6: In case that the business uses WordPress, Publing WordPress Plugin can be used.
In order not to affect your live display, you can make customisation on test environment. In case any change of design or customisation after you have published your display and embedded it, it is enough to make changes on the Publing dashboard, you won’t be needed to change the code on your website.
Start setting up your Social Media Display with Publing, if you need help, please contact us.